
Last updated on August 31, 2023 9:46 pm
Frequently Asked Questions

What is the most basic joint to use?
A butt joint is the simplest type of joint. You only have to cut a piece of wood so the other end could butt into it and join.
What are the strongest wood joints?
The strongest joints are mortise and tenon, dovetail, and finger joints. However, they are strong for the most applicable use. Dovetail makes a reliable joint for joining panels, finger joints are great for joining posts. While mortise and tenon is strong for different applications.
What's a good tool to help me joining wood better?
If you're into wood joinery, invest is some woodworking clamps, a working table, and a biscuit joiner.
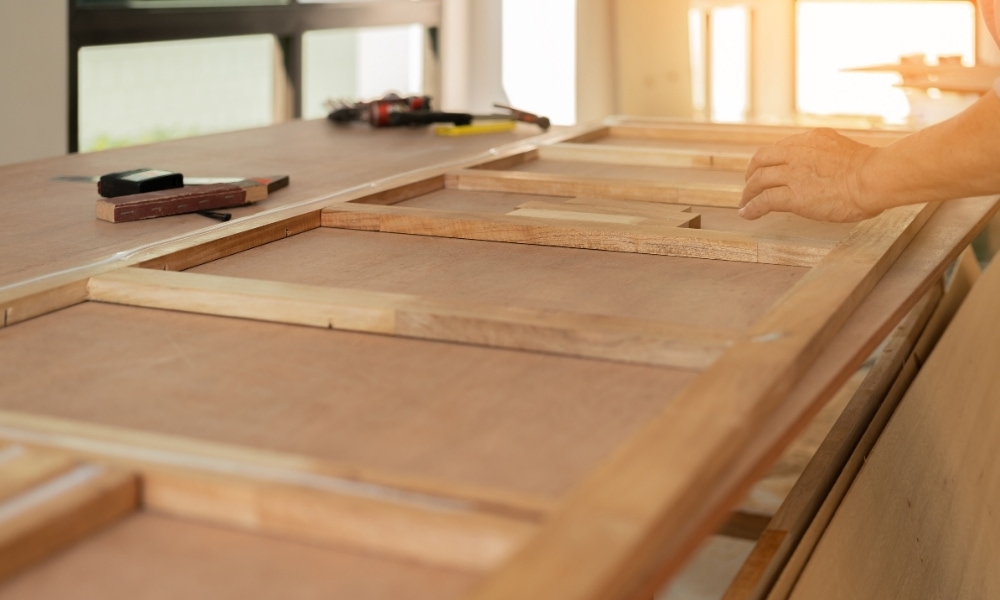
You can’t build any furniture without joining woods.
According to Aaron Barnett of BangingToolbox: You will often find yourself building custom-wood components when it comes to woodworking.
Wood is sturdy and durable, as its unique properties also give it high workability, making it easier to cut and shape. For this reason, knowing how to join two pieces of wood end-to-end in place will help you make the most of your ideas and resources for your projects.
This guide will cover conventional and practical techniques that you can use to join two pieces of wood together to meet all and any of your woodworking project needs.
What methods can join two pieces of wood end-to-end?
These are the most common and popular methods that most professionals and hobbyists use when joining together two pieces of wood. We’ll be going over each one in detail later on.
- Screws.
- Wood Glue.
- Splines.
- Drill and dowels.
- Bevel-cut scarf joints.
- Miter-cut scarf joints.
- Half-lap joints.
- Tabled lap joints.
- Finger joints.
- Dovetail joints.
- Biscuit joints.

How to join woods using screws?
You’ll be using the pocket-hole screw technique to be specific. This is basically screwing together the butt ends of the wood at angled holes that hide the screws within. Here’s how to join two pieces of wood with screws:
Things to prepare:
- Marker.
- A power drill preferably cordless.
- Screw jig.
- Screws.
- Mark where you want to drill in the holes. Don’t put them near the edge of the workpieces.
- Line the two pieces you wish to join.
- Drill at an angle using a screw jig or your eyes.
- Screw and fasten.

How to join wood using wood glue?
If you’re wondering how to join wood planks for tabletop, this method is basically gluing together wood ends to arrive at a single, bonded piece.
What you need:
- Brush/applicator.
- Wood glue.
- Rag/cloth.
- Wood clamps really help.
- Make sure to clean the surfaces of the pieces to be glued.
- Apply wood glue evenly on one of the pieces.
- Press both pieces together until they’re perfectly flat and leveled against each other.
- Apply pressure with wood clamps to hold them together throughout the drying process.
- Wipe off any excess glue and leave it to dry.
How to join wood using splines?
A spline creates a face-to-face [1] gluing surface that’s more stable and resistant to flexing.
A spline is basically a piece that fits between two other mating pieces and is later assembled into one cohesive piece.
If you’re thinking about how to join two pieces of wood without a jointer, you can use a router or a table saw to do this.
Tools that you needed:
- Router/table saw.
- Ruler.
- Marker.
- Measure and cut out your desired spline piece.
- Using a router or table saw, cut a spline-matching slot into both mating pieces. If you’re using a table saw, set the blade height and position the cutting fence.
- Press in the spline into either of the mating pieces, followed by the other.
- Once happy with the connection, apply wood glue and slot everything into place.
How to join wood using a drill and dowel?
Using a dowel is just one of the methods on how to join two pieces of wood end to end.
The dowel joint can create an invisible connection that closely resembles a cable plug.
Dowels make strong edge-to-edge connections gluing surfaces even more so than splines.
What you will need:
- Power drill.
- Dowels.
- Wood glue.
- Ruler.
- Marker.
- Clamp.
- Butt the pieces to be joined and mark the dowel positions on both pieces; center each dowel position relative to the measure of the connecting pieces.
- Place your dowelling jig over the marks.
- Drill holes that are 1/16” deeper than half the dowel length.
- Spread glue on the dowel holes and dowels themselves and force them into a connection. Clamp together and allow to settle.

How to join wood using bevel-cut scarf joints?
A bevel-cut scarf joint is basically butt ends that were cut at an angle and glued together.
Bevel-cut scarf joints have about 40% more adhesion and are near seamless once completed.
Things you’ll need ready:
- Power saw.
- Wood glue.
- Triangle.
- Marker.
- Clamp.
- Prepare and mark out at least a 45° angle on both ends of your two mating pieces.
- Make a 45° cut on one side and the mating end on the opposite side.
- Line the edges together and make sure they mate perfectly.
- Apply glue, clamp, and let dry.

Here’s our guide on cutting bevels for a 45-degree angle joint.
How to join wood using miter-cut scarf wood joints?
A miter-cut scarf joint is basically the same as a bevel-cut one, only with a larger gluing surface thanks to using a 4:1 angle guide.
Things to prepare:
- Power saw.
- Wood glue.
- 4:1 triangle.
- Marker.
- Clamp.
- Prepare and mark out at least a 45° angle on both ends of your two mating pieces.
- Make a 45° cut on the connecting sides of the two pieces.
- Line the edges together and make sure they mate perfectly.
- Glue and clamp the two pieces together perpendicular to a flat surface for maximum hold.
How to join wood using basic half-lap joints?
A basic half-lap joint is an aesthetically pleasing and strong face-to-face gluing surface. It kind of looks like Tetris pieces; the more overlaps, the better the bond.
What you need first:
- Power saw/router.
- Wood glue.
- Chisel.
- Ruler.
- Marker.
- Measure and mark out where you will create your laps on both pieces while holding them flush against each other.
- Set your depth of cut to about half the total thickness of the workpieces.
- Cut a series of closely spaced kerfs on each piece.
- Clear out the kerfs and flatten out the now-depressed areas.
- Assemble the joint by placing the pieces together, making sure the laps form a 90° angle.
How to join wood using tabled lap joints?
Tabled lap joints are strengthened half-lap joints with the addition of interconnecting parts.
Things to prepare ready:
- Router.
- Dado set.
- Wood glue.
- Marker.
- Add ¼” to the width of your workpiece.
- Measure and mark out the pieces same as how you did with a half-lap joint.
- Set the dado blade height to exactly 1/3rd workpiece thickness.
- Rabbet both workpieces from your markings to the ends.
- Reset the dado blade height to 2/3rd workpiece thickness.
- Measure and mark from the shoulder of the dado to a distance that’s ½ of the workpiece width.
- Cut out the remaining dadoes and assemble, trim to fine-tune joint tightness.
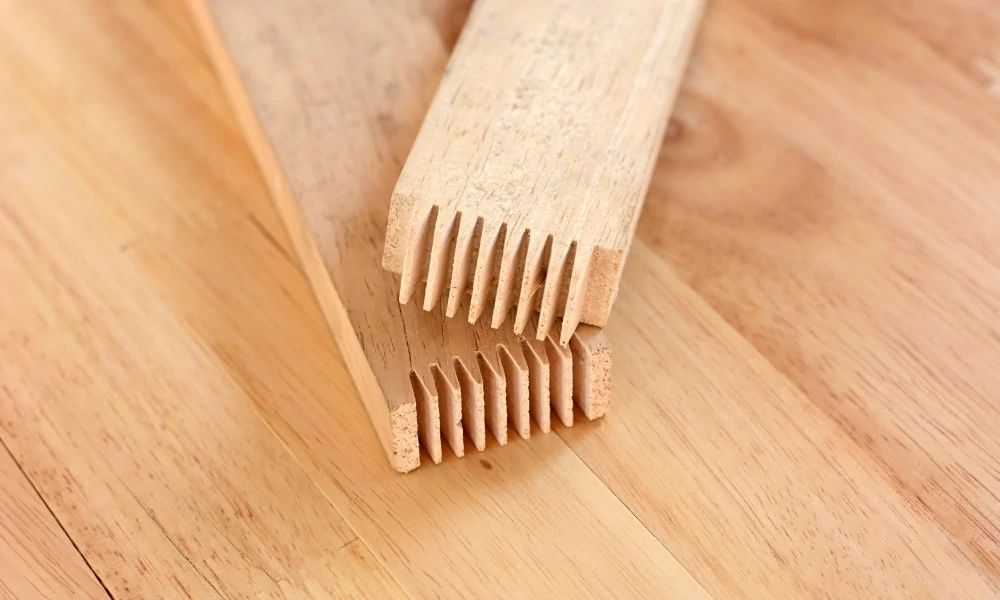
How to join wood using finger joints?
Also known as box joints, this joinery method is both easy and strong.
The connecting parts look like interlocking fingers and reduce the chance of bending.
Tools and materials needed:
- Table saw.
- Slotting jig.
- Wood glue.
- Marker.
- Clamp.
- Prepare your table saw and select an appropriate blade.
- Make a stop for the jig using a piece that’s smaller than your workpieces.
- Assemble the jig.
- Make the 1st cut on the workpiece by holding its edge flush against the jig.
- Slot the cut onto the jig and finish along with the piece until no more cuts are possible.
- Assemble the joint.
How to join woods using a dovetail joint?
A dovetail joint is an elegant and very strong joinery method that’s primarily used to construct furniture such as cabinets and drawers.
Though mostly cut by hand, by woodworkers it’s also possible with power tools by using a dovetail jig.
What you need:
- A dovetail saw or a dovetail jig.
- Wood glue.
- Ruler.
- Marker.

How to join woods using biscuit joints?
A biscuit joint is when two pieces are glued face-to-face using a small fastening agent called a biscuit that sets and expands once it absorbs the glue, creating an almost seamless bond.
You need a specialized biscuit joiner to join wood like this.
Tools needed:
- Biscuit joiner
- Wood glue
- Marker
- Mark a line across both workpieces.
- Line up the biscuit joiner to the mark and make a cut. Do this for both ends of the joint.
- Apply glue to the slots and let it set.
- Insert the biscuit and clamp the pieces together to bond.

What methods can join wood corners?
You can use pretty much the same methods as listed above to join corners; you simply orient the workpieces perpendicular to each other, then proceed with your selected joinery method. Not much on actual steps, but these are some of the most utilized methods:
- Basic butt. A way how to join two pieces of wood at right angles is to align the edges flushed perpendicularly with one another.
- Mitered butt. A basic butt joint by cutting at a 45° angle will give a more gluing surface.
- Tongue and groove. Used for joining boards square to each other along long edges. Much stronger than using butt joints as it offers more joining surface.
- Biscuit joint. The same principle as with end-to-end joinery only this time orientation is at 90°.
- Pocket joint. Involves cutting a slot and drilling a hole at an angle into the connecting parts, concealing the screws used to fasten the pieces together.
- Rabbet joint. A dado cut along the edge of a workpiece; mainly used in cabinetry.
- Dado. A simple square-grooved slot on a connecting piece of a mating pair.
- Mortise-tenon. A classic joinery method [2] preferred for its elegance and hold-strength.
- Half-lap. Strong, charming Tetris-cut pieces that are a level above mere butt joints.
- Dovetail joints – One of the most renowned joinery methods that come in 3 variations (Half-blind, through, sliding). Dovetails are generally eye-appealing and are among the strongest of wood joining techniques.
- Finger joints – The simple alternative to dovetails; still nice to look at but not as good looking or practical.
What is the best way to join a wood corner?
Talking about overall practicality, complexity, and strength, the best way to join wood corners is a tie between the miter cut, mortise and tenon, and pocket screwing.
The miter cut is very simple to do and can be done on almost any scale.
The mortise and tenon are able to hold stronger than a miter but are also more difficult to do.
Lastly, the pocket screw method is an in-between of the other two and still does not only rely on gluing for large more simple jobs.

The best-looking and strongest wood joinery corner joint has to be either the tabled lap joint or dovetail joint, specifically the dovetail.
A tabled lap joint is basically all that a half-lap is, but better; adding more holding strength thanks to the interlocking shape.
Tabled lap joints are highly effective for straight and long workpieces.
Just as a dovetail is beautiful and exceptionally strong, just like a tabled lap joint, albeit being a tad more complicated.
What is the best way to join wood end-to-end?
The strongest and fastest way to join wood end to end is to use a biscuit joiner, simply align to pieces to be joined.
Cut the slots using a biscuit joiner, apply some glue and insert the biscuits for a strong connection.
It’s not impossible to join your wood pieces.
With so many methods available, you won’t be running short in terms of options for your projects.
Big or small, narrow or long, there’s a joinery technique that’s bound to be a perfect fit for your needs.
Notably, a biscuit joint is one of the best ways to go thanks to its cost-efficiency, strength, and time-saving effectiveness.
If you want to learn more about different types of wood for woodworking read here.

More information:
- 8 Ways to make end-to-end joints that hold, an article from https://www.woodmagazine.com/woodworking-tips/techniques/joinery/end-to-end
- Use of mortise tenon joint, published on https://www.thesprucecrafts.com/creating-a-mortise-and-tenon-joint-3536636


