

Last updated on June 6, 2022 1:36 am
What you should know about laser levels?
Aaron Barnett of BangingToolbox suggests: A laser level is a pretty easy tool to use but is a lot of tricks and techniques you can use to do more than what you would think possible.
It is important to note that not all laser levels are the same, so when wanting to know how to use a laser level each different type of laser is better for different types of jobs, more on this below.
Pick the right type of laser level
First, make sure you have the correct laser level for the type of work [1] you want to be doing. Below are the different types of construction lasers, as each type is efficient for doing different types of work in different ways.
3 Point construction laser level
3 pointers are what first came out when laser levels were introduced to construction, they are useful for plumbing corners and installing and plumbing door frames.
But these days, it doesn’t make much sense to get a 3 pointer just because they can’t do much more than that.

Pros
- Can level a door frame.
- Can plumb a wall corner.
Cons
- Can’t square plan view.
- Can’t straighten walls.
- Can’t level.
- No full laser lines to work to.
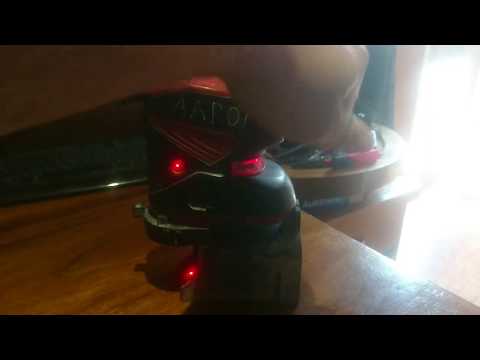
5 Point carpenters laser level
A 5 Point carpenters laser level is designed to shoot 5 points at 90-degree angles from each other including also a full level and plumb line.
This makes a 5 point laser level the top choice for carpenters with such a wide variety of measuring points to use.

Pros
- Can level door frames.
- Can plumb wall corners and any point along a wall.
- Can square lines on the ground.
- Can shoot a visible level line.
- Can shoot a visible plumb line.
- Many brands to choose from.
Cons
- The horizontal level line is not a full 360 degrees.
360 Laser level
A 360 laser level is great for people that do ceiling grids or wall partitioning, with 2 fully interesting laser lines, if you have 2 of these laser levels you can use them together to shoot the full box of a room to mark it out before building.

Pros
- Shoot s a full 360 laser level line.
- Shoots a full 360 vertical plumb line.
- Both the plumb and the level lines intersect at each angle giving you the points a 5 pointer would (Except a ground dot).
Cons
- Can’t plumb a door well.
Cross-line laser
This type of laser is better for a homeowner or an artist, a crossline laser doesn’t have the same functionality as a 5 pointer or a 2X360 laser but it can give a cross line in just one direction for a cheaper price.
Pros
- Visible level and plumb crossline.
- Cheaper than other lasers.
- Great for homeowners or artists that need to project a level line to hang paintings on the wall.
Cons
- Doesn’t have enough functions for building.
1. Laser level settings
- On / Off Button – You might have to hold the button down for 3 seconds to switch off the tool.
- Pendulum release switch – There will be a lever on the side somewhere to release the internal self-leveling mechanism and for the laser to self-level. You need to lock this again before moving the tool this is to protect the inside during movement.
- Battery saving mode – This button will slightly dim the line to extend battery life.
- Laser selection – This button lets you scroll through different modes to select only the laser point or lines that you need, this can also save battery.
2. Mounting options
No matter what type of leveling equipment you have it is important to position the tool sturdy and level enough for it to self-level.
- Installing on a construction tripod. A phenomenal laser level like the Leica Lino will fit on a standard construction tripod. These tripods make it pretty easy to set up the tool to a first class working height.
- Mounting on a camera tripod. Most cross line and 3 and 5 point lasers are compatible with camera tripods also, smaller and lighter weight than a construction tripod makes them better-suited for low down positioning.
- Attaching to a metal surface using a magnetic base. The top laser levels will include a base with a magnet, this makes mounting to any metal surface like a steel beam easy. What I like a lot about this method is how easy it is to slide the base up and down a steel beam to get a horizontal line at the exact height you need.
- Hanging on a nail. Most lasers provide a hole in the base to simply hang the laser level on a nail. First, mark your height on a nearby peice of timber framing, and then tack in a nail. Bend it upwards, and let the laser hang in the right position by hocking the mounting base over the fixing you installed. Although it takes a bit to get the tool in the exact position you want. You could instead work from whatever height the laser level ends up at, by measuring an “offset”.
- Sitting a laser on the floor. Generally, you can just set your laser up from the floor, you can get a few blocks of wood if you want to make it sit a bit higher.
3. Identify the type of laser level jobs
Different Types of lasers are good for different types of jobs as discussed above. But let’s narrow down how to do each specific task.
An “offset” means a reference line that does not necessarily indicate any exact position for a wall or anything, this of-set can then be worked from as a parallel line to exact wall positions.
How to plumb a corner
You want to draw an 8-inch “offset” line on the floor for both walls meeting in the corner. This will give you a perfect point to set the laser on.
Once you set the plumb line on your laser shooting the exact point you marked on the floor, you can use can then measure back from any point of the wall to the laser dot knowing that when you measure 8 inches the wall is in the right spot, and anything different indicates that it needs to move.

How to square wall bottom plates (With a 5 pointer)
The beauty of a 5 point laser level is that it can be used as a giant square plan view. And used to mark the position of all the bottom plates before framing.
- Start by creating an “of-set” line at either end of an existing wall or from a line that can be used to base all marks for the set out of your new wall.
- Use a chalk line to ping a mark on this line. A blue chalk line is for a temporary mark. A red chalk line leaves a permanent mark that isn’t wiped of easily.
- Now set the laser at any point on this line, by aligning the plumb dot to your chosen position along the chalk line. You then want to align a second laser dot at either end of the chalk line the further back you go the more accuracy you will have, you will need to level the chalk line up the wall to get to the same laser height.
- Now that you have aligned your laser with each end of the straight line, the vertical line will be shooting and displaying a perfectly straight and square line.
- Call these two lines “grid lines” Use these two important reference square lines, to measure and position all the walls in a building.
How to straighten a wall
A cross-line, 2X360, or a 5 pointer can quickly identify bulges and inverted areas of a wall.
Set up an 8-inch “offset” line at either end of a wall, using a chalk line.
Then align the plumb dot up with this “offset” line at one end.
Then align the vertical line to intersect this 8-inch “offset” all the way down the line on the ground.
Now you can put your ruler on any point of the wall and read its “offset” and compare it back to the 8-inch reference that you should be measuring if the wall is straight.
You can then pack out a wall as needed, or plane a wall as needed using your cordless planer.
How to transfer heights
Using the cross line option, available with a cross line laser or a 5 pointer, means you can quickly transfer level heights around a room, or building.
Position the laser correctly, choose to either shoot the vertical line exactly on point or on an “offset” instead.
Sometimes you might need to use an “offset” such as checking a floor.
For example, checking an existing floor for level, first, pick a point of the floor, and set a laser level up to an 8-inch “offset”.
Then measure at the spots you want to check, anything more or less the 8-inch offset is the difference in level to fix.
How to level wall linings
- Mark all your lining sheet joins on the floor next to the bottom plate, make sure this lines up with the center of your studs. You want to add a bit to each sheet join for allowance of a small gap between each sheet. This gap can start to add up after 3-4 sheets.
- Use a square to mark a decent line at all the points on the floor at least 2 feet.
- Use the vertical laser mode and align the bottom square line up with the plumb dot and the vertical line this is to keep the laser square to the wall. You then want to go through and transfer all these marks on the ground to the top plate or the ceiling framing.
Mistakes to avoid
Thinking the full vertical line can be used instead of a plumb dot. The plumb dot is more reliable, the plumb line is only good to one axis. Unless you have positioned your laser absolutely perfectly square to a wall or the wall the laser is shooting on is perfectly plumb itself.
You need to square the laser to the wall because the vertical line only plumbs in one direction. The plumb dots are good in both directions.
When not to use a laser level
Laser levels are excellent for most internal short distance jobs.
However, if you doing critical building placement and setting out at long distances you cannot rely on a laser level, instead, you need to use a tool like a dumpy level.
Dumpy Level
A dumpy level is preferred for important leveling jobs over a laser level as it is relied on for more accuracy over long distances.
The disadvantage is that it requires 2 people to operate, and is slower to use.

Should you get a laser level?
If you haven’t used a laser level before and thinking of getting one, a laser level is a quick and accurate tool for internal leveling work.
Some art galleys even make use of laser level’s for displaying artwork on their walls perfectly.
If you want to know what the best laser levels are see what I recommend here.
More information:
- What Dewalt thinks on what laser level to use for what job can be read at, https://www.dewalt.com/dewalt-dna/featured-articles/laser-buying-guide


