

Last updated on March 28, 2023 6:22 am
Need to replace the punch and die of your nibbler?
According to Aaron Barnett of BangingToolbox: Replacing a punch and die on a nibbler tool is no rocket science.
When your punch and die screams replacement, you have no other choice but to replace the blade.
Otherwise, you not only risk the cutting output on your workpiece.
But you also risk the health of your nibbler tools motor with the extra force required to complete each up and down motion.
For this reason, you should know how to replace the punch and die mechanism of a nibbler tool.

Why should you replace your punch and die?
When your punch and die need replacement, you should do the repair as soon as possible.
Your nibbler tool will have to work harder when you keep using worn punches, which adds stress to your valuable motor.
Here are more reasons why you should replace a broken or worn-out punch or die:
- The nibbler’s cutting quality decreases
- Tool wear increases
- It stresses the nibbler motor.
- To avoid safety risks

Replacing the Punch
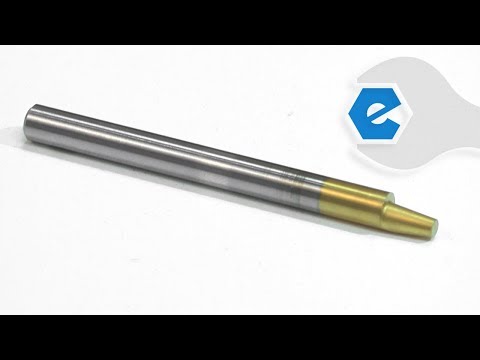
The punch is a pointed metal rod that moves up and down to make the cut. It creates an indentation that serves as a guide for the nibbler blade to perform the cut.
If you worry about how to replace the punch, you’d be surprised how relatively easy nibbler maintenance is. But you do not replace the punch any time you like.
When is it time to replace the punch?
If you are still in doubt about when to replace the punch, look for these signs:
- When the tool has been producing jagged and irregular cuts
- When your punch has worn and becomes shorter
- When the punch is chipping and showing visible signs of breaking
- When you find it hard to cut metal

How to replace a nibbler’s punch?
If your blade needs replacement, we have simplified the steps to change your tool’s blade:
- Remove the nut that secures the die assembly with a wrench. This procedure will expose the pin inside. After removing the nut, remove the die assembly.
- Carefully unscrew the nibbler head that holds the punch using an Allen wrench. It is usually held securely by a screw. Also, take note of the rotation counts you did for unscrewing. These counts should be the same when reinstalling the punch.
- Pull off the punch carefully, set it aside, and take the new punch.
- Reinstall the replacement part. Align the recessed hole in the blade to the screw holder of the nibbler’s head. Tighten the screw back.
- Reinstall and tighten the nut.
Replacing the die and die holder
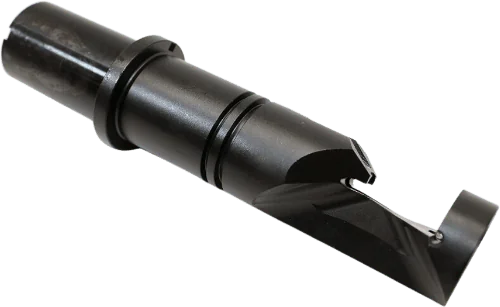
A punch is nothing without a die. The die works in conjunction with the punch.
The die is placed below the punch. As the punch moves down, the edge pierces through the metal sheet and presses down the die.
This mechanism shears the metal away from the nibbler and performs the cut. A punch will not complete a cut in a nibbler tool without the die.
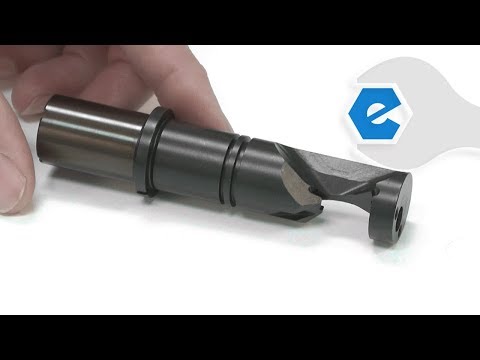
Meanwhile, a die holder secures the die and keeps the cutting punch in place while the tool is making a repetitive cut.
The die holder is a rugged component that could take repetitive vibrations and cutting impacts from the punch and die on a standard day on the job site.
However, a die and a die holder may not always take the repeated impact from the punch like the average screw facing your impact driver.
There will come a time – when the two components need to be replaced. If you continue using a worn-out die or a bent die holder, you may produce a sloppy finish.
When is it time to replace the die?
We advise you to change the die when you change the punch. However, there are other cases where you should replace the die.
- When you replace a punch
- When your cuts are leaving jagged edges
- When your dies are corroded
- If your cuts are showing burrs on the edges
- If the nibbler creates excessive noise
When is it time to replace the die holder?
- Punch and die misalignment
- Bent die, holder
- Wear and tear
- Loose punch
- Poor cutting quality
How to replace the die and the die holder?
When replacing the die and die holder, turn the tool off first.
- Remove the nut that holds the die holder. Use a wrench for this task.
- Loosen the screws that hold the die. There are two screws that fasten the die. Usually, your tool comes with an Allen wrench for unscrewing. Use the one according to the screw size. Remove the die.
- Set the old die and die holder aside. And take the new one.
- Assemble the die and die holder with an Allen wrench.
- Insert the die assembly on the nibbler tool. Make sure that the punch is properly aligned.
- Tighten the nut that secures the die holder.
- Test the die assembly at a slow speed.
Tool usage and care tips to avoid frequent replacement of parts
- Avoid force-cutting with your nibbler.
- Avoid using your tools when the switch does not work.
- Disconnect your nibbler before adjusting or replacing parts.
- Store your tool in a cool, dry place to avoid corrosion.
- Check all the moving parts regularly for misalignment, breakage, or corrosion.
- Follow the manual for lubrication instructions.
Final word
Changing the punch and die is so easy. You only have to make sure that the tool is off before proceeding with changing the punch.
Make sure to wear safety gloves for added safety. To prolong your punch and die, you must clean and lubricate the tool regularly.
Lastly, choosing the right tool for that metal-cutting job should be treated as an investment.
Make sure you are using a superior quality and reliable nibbler that can really make the cut!
This will help you save from frequent replacement tools.
If you are looking for suggestions, see how Makita nibblers work from my tests.


