

Last updated on March 23, 2026 9:38 am
Do you know when your nibbler is in good shape?
Aaron Barnett of BangingToolbox suggests: Before using your nibbler, you have to ensure that everything is working and in good condition. This cutting tool is powerful enough to cause injuries if you don’t prepare and check over the tool.
The best thing you can do to ensure that you are working safely with a nibbler is to inspect and prepare everything before proceeding with any cutting task.
Aside from that, you want to ensure that the tool will work at an optimum performance level.
Detecting issues before cutting is crucial to performing any cut smoothly and efficiently.
In turn, inspecting and preparing a nibbler regularly before cutting metal helps you extend the life of your nibbler and keep it in shape.
But how do you inspect and prepare a nibbler tool before you cut metal sheets?

Parts to inspect before using a nibbler
Skipping inspection can get you in trouble with a nibbler tool, especially if there are worn or loose parts.
Anything can go wrong, from a malfunctioning nibbler to a damaged nibbler.
While the event can result in inconsistent cutting results, missing inspection could result in possible damage and, worse, injury.
1. The power source
Power cords and batteries need to ensure safe grounding of the electrical supply to the nibbler tool.
A power lead connects to the electrical circuit to the tool’s motor. If you are using a cordless nibbler, the power source comes from the battery, but the battery charger is connected to an AC outlet.
When working with the nibbler, any of these two types should provide the operator with the flexibility and mobility to use the tool.
For this reason, you need to inspect cables for signs of breakage, cuts, or fraying. You must inspect the entire cord’s insulation before plugging the charger or the tool into the power supply.
Check the plug and see if its grounding prong is still intact.
If you are using a cordless nibbler, check the battery for dents, cracks, or swelling.
Check the battery terminals and contacts for any signs of corrosion, dirt, and debris. If parts need cleaning, use a soft, dry, and clean cloth with a mild cleaning solution.
Meanwhile, if you are using a pneumatic nibbler, inspect the air inlet for loose connections or fittings, or damaged seals. Compressed air can be equally as dangerous if there is a burst.

2. Housing
A nibbler’s housing keeps the internal components intact. It protects the internal parts from dust and debris, and external impacts.
The case should provide good ergonomics when in use, especially since the tool suffers from potential vibrations during operation, and you need to maintain a comfortable and workable grip.
Since the handle and casing are in contact with your hands, you need to ensure everything is in good shape.
Look for signs of cracks, dents, or structural weaknesses.
Also, check the opening where vents let air through. These gaps must be free from dirt and dust. Otherwise, you need to clean the surface.
Most importantly, check the housing fasteners like bolts and screws. Make sure they are fastened correctly and securely.
3. Punch and die
The punch and die make the cut. They are two of the most essential parts of a nibbler and they’re crucial for making precise cuts.
Check the cutting edges and look for any signs of chipping, dullness, and wear. Don’t forget to ensure that the punch and die are properly aligned.
Also, see if they need lubrication. Any signs of resistance, roughness, scoring, or heat generation require lubrication.
4. Brushes
The brushes are crucial in maintaining electric and carbon contact and working with the commutator.
Find the brush holder and remove them carefully.
Check for significant loss of brush length, signs of wear, fraying, cracks, chips, or excessive carbon buildup. Otherwise, you’ll need to replace it. after checking, install the brushes again if they are in good nick.
Tip: you will see sparks coming from the motor if the brushes have worn out and need immediate replacement.
5. Switches
Check for the functionality of your switch buttons in the on and off position and the smoothness of any variable speed switches.
Look for any irregularities and asses their responsiveness. Also, check for loose and corroded wirings if they are not responding.
How to prepare a nibbler before using it?
Now that you have inspected your nibbler, it is time to prepare it for building and construction site operations.
If some parts of the cutting assembly have been disassembled from inspection, do not assemble them yet. Give room for cleaning.
Step 1 Clean your nibbler tool.
Disconnect your tool from the power source every time you will inspect or clean the tool.
Disassemble the cutting assembly one by one so you can access the punch and die.
Wipe your tool with a clean, dry cloth. Remove dirt and grime that has built up.
Check the punch for sharpness.
For one last time, check for damages before putting everything back together.
Here’s a guide to replacing the punch and die when needed.

Step 2 Lubricate the tool if needed.
After cleaning, lubricate the tool. This step will help the device withstand the effects of vibration, friction, heat, and impact.
Check your manufacturer’s recommended lubricant. Focus on moving parts like bearings, pivot points, and gears.
For the punch and die, apply a generous amount on the parts, always in contact when cutting.
Distribute the lubricant evenly and wipe off the excess. Note that you don’t have to lubricate every time you will use a nibbler.
But make sure to do this as part of regular maintenance, depending on the frequency of use.
For air nibblers, air tool oil drops are filled into the air inlet.
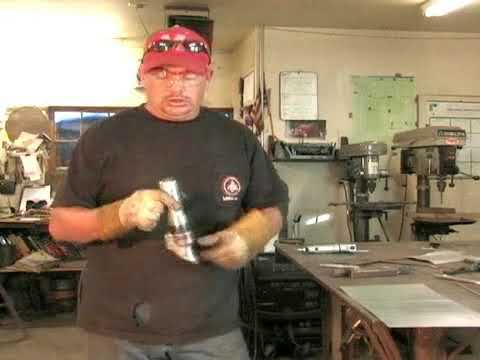
Step 3 Check punch and die attachment and alignment.
Make sure your tool is turned off. See the cutting mechanism and the quick-release system. Check and tighten the knobs, screws, or bolts.
Try to place the punch and die close to each other and lightly press the punch. See where it lands.
These components must be parallel to each other. They must have contact along their cutting edges. If needed, adjust the punch or die to position.
If they are aligned, you can proceed to test the nibbler.
Step 4 Set your nibbler tool for testing.
Look for adjustment knobs or levers to change the cutting direction of the nibbler.
Fasten the knobs and screws. Find the switch for setting the cutting speed. Start with low speed first.
Step 5 Test your nibbler on a scrap piece of metal.
When everything is set, you can test the nibbler on a metal scrap. Secure the workpiece and hold it firmly. Use a metal clamp.
Connect the plug to the outlet. With a secure grip, place the cutting edge at your starting point. Activate the tool. And observe its movement.
Start gliding the tool in your cutting direction. Test it at different speeds. Observe the cutting action and the quality of the cut.
Turn your nibbler off after testing.

When Should You Not Use a Nibbler?
- If there are loose or damaged parts
- If there are signs of malfunctioning
- If the blade is blunt and needs replacing
- If the tool is incompatible with your material’s thickness
- If you are anywhere near flammable materials
Now that you have inspected and prepared your nibbler
If your tool has no significant signs of wear, damage, or malfunctioning, your nibbler is good to use. It should engage and disengage or change speeds smoothly when in use.
Your nibbler is in good condition when it cuts smoothly. The cut must be accurate, clean, and precise.
If you’re not comfortable with your tool’s performance or behavior, do not use it and bring it to your manufacturer or local repair shop.
Some low-quality nibblers may not stand the impacts and shocks even after inspections, realignment, lubrication, and adjustments. To avoid this hassle, see how our recommended nibblers perform in this guide.


