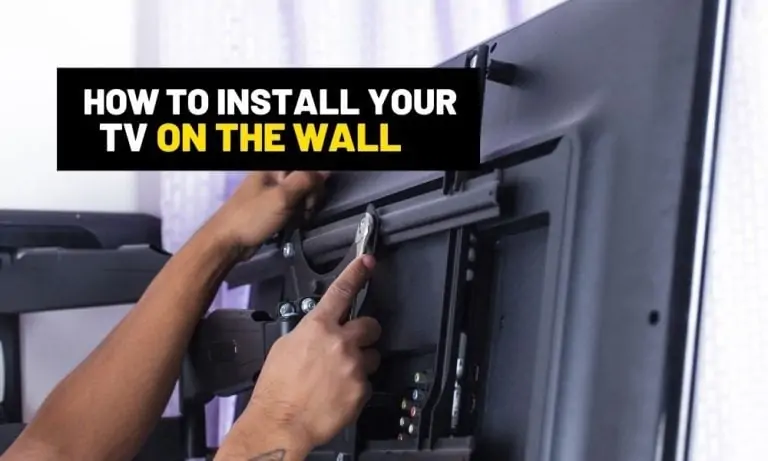
When choosing how to mount a TV on the wall, the choice often comes down between a portable tv stand, flush fixed tv mount, or an extendable tv mount.
Which one to go for depends on how you will use your TV and what you expect from a TV wall mount.
According to Aaron Barnett of BangingToolbox:If you plan on mounting a TV at eye level and you don’t expect to have to move it around, a fixed mount might be your choice.
Fixed mounts are also suitable for situations wherein you won’t need access to the TV’s ports too often.
Fixed mounts are generally easy to install and are often the most affordable types of TV mounts.
On the other hand, go for an extendable tv mount if you want to be able to watch TV from different areas of a room.
However, keep in mind that extending mounts will have to be mounted more securely to allow for regular maneuvering and extended weight.
So have you got a timber or concrete wall? First, consider the wall where you will be installing a TV. In most cases, you will have no choice but to work with the wall and its current state.
Concrete walls give more freedom to install the mount where you want, although installing it securely will require more work with special bolts and screws designed to anchor in the concrete.
With a wooden wall, you will have to work with the existing structure or install a new timber frame. This may require removing and reinstalling the plasterboard, with a fresh coat of paint.
Painters tape can be a useful aid when mounting a TV to the drywall.
It can be used as a non-permanent marker to mark off the ideal height of the wall mount and test out a position.
You can also use painter’s tape to mark fixing points on the wall like studs.
Make sure to mark off the installation spot accurately, using a stud finder can help.
Decide on the optimum height for your TV.
Use a level and mark the top and bottom edge where the TV will be with painter’s tape.
If necessary, use the paper template included with your wall mount. If the package didn’t come with a template, you will have to measure out the mounting spots manually.
Mounting the TV bracket [Overview]
Break this up into 3 steps, first install the plate on the wall, next install the connection bracket to the TV, and lastly, the TV with the connection plate should just lift and hook onto the wall plate.
This is the case with most TV mount designs, smaller full motion brackets might be different.
4. A) Installing a TV mount on a timber wall
Mounting a TV to a wooden wall is usually easier than mounting it to concrete.
The material is softer and easier to penetrate, so screwing in the hardware is fairly easy after finding the locations of the studs.
That being said, make sure to reinforce the framing if you have a particularly heavy TV.
And if the studs are too far apart–or if there aren’t any studs at all – you will have to do a bit of prep work to mount your TV securely to the wall.
How to find studs inside a wall?
The most important part of mounting to timber or drywall is learning how to find studs in the wall for TV mount.
In many cases, this is as easy as following the electrical outlets and light switches, which are commonly installed on studs. Here’s how to find the studs in drywall:
What if you can’t find a stud?
If you have trouble finding the stud, using the tapping method consider purchasing a stud finder.
They won’t cost much and will help you find the center point of any stud that is covered by drywall less than 1 ½ inch thick.
When using the tapping method, you should check for framing before drilling a big coach screw into the wall.
First, look for outlets that can give you a clue to where a stud might be located.
Pinpoint where the wooden vertical framing runs, by taping the wall and listening for a solid sound, or using a stud finder.
Most TV mounts require 2 studs for the right fixing, so once you have located the first stud search for the next closest one, try checking standard stud spacing first by measuring 16 and 24 inches, and then use the same technique above to check it.
Confirm what this stud spacing is and make sure to order a TV mount bracket that is compatible with this spacing.
Use a small panel pin or nail, and make a few holes, to find both edges of the stud.
This means that when fixing the wall plate you know to fix it directly in the center of a stud, and not risk fixing it into the side of the stud where it won’t be a stronghold.
Use a battery drill to drill the pilot hole and a crescent or socket set to screw in the coach screws.
These holes can be easily filled if you remove the TV mount in the future, but currently, the bracket will easily hide them.
To prevent cracking the drywall, and to actually get a coach screw in easily it is necessary to pre-drill holes for coach screws.
Don’t pre-drill a hold too wide, however, that the screw won’t fully bite and tighten up.
Aim for some Irwin or Milwaukee drill bits slightly less than half the thickness of the solid part of the coach screw, not the thread.
You may need a socket set to tighten the screw by hand.
If the screw has a screw head (not ideal) make sure your drive tool or drill bit matches the heads perfectly as well to prevent stripping.
Use coach screws to attach the base plate of the wall mount to the wall. These screws have a much wider gauge so you can distinguish them from regular screws.
The best timber screws for wall mounts have flat heads that sit flush with the surrounding bracket.
They are typically made from hardened steel, although brass and stainless steel screws are quite common as well. The TV mount will come with the right screws that you need.
What to do if the studs are too far apart?
What if the studs are too far apart? Some mounts won’t support standard stud centers.
Your options then would be to change it out for a tv mount that fits or cutting the wall open and adding more horizontal fixing.
This might be the more feasible course of action if you are mounting a big TV like a 65, or 70-inch TV on an extending arm.
This results in a more secure mount that won’t twist the studs even when your TV is heavy.
Here’s how to mount a TV on a wall where the studs are too far apart, or you want extra timber to support a load from a heavy TV on the extendable mount:
Mark the plasterboard to be cut out on your wall, it should be a rectangle shape.
Starting with marking the vertical points, this is going to be in the center of both studs exactly. This is so if you reinstall the plasterboard you already have timber fixing there, so use this piece you are cutting out as the replacement plasterboard so you don’t have to buy a brand-new sheet.
Locate the height of the TV to install.
Measure the height of the bracket and the distance between the top and bottom fixing points in the mount.
Give yourself enough room to add horizontal fixing that will cover your two fixing rows, and slip up behind the plasterboard cut out, to act as a line for fixing for the plasterboard as well on the horizontal lines. Use wide timber 6/2 or 8/2 this means you have plenty of surface fixing surface for this.
When you work this out mark the top and bottom cut outlines.
Now cut out the lining with a knife and an old hand saw. You can later use the lining you cut out by gluing it back on the stud with screws. So be careful to do a nice cut, without breaking any corners. Even if a wobbly cut is done, the cutout piece should fit back in like a jigsaw puzzle, the join will later be hidden with plaster, and paint.
Add a suitable length of framing at the top and bottom of the lining join as solid horizontal fixing in the wall as required by the TV bracket, this should ideally be the same bit of timber. Meaning there are 2 total horizontal blocks, not 4. Use large Tek screws or coach screws back into the studs at either end as this will support the weight of the TV.
4. B) How to mount a TV on a concrete wall
When mounting a TV on a concrete wall, use the template that came with the wall mount to mark out the right spot on the wall.
The process is similar to using painter’s tape to mark the mounting holes.
Use a pencil to mark the spot where you will drill the holes according to the TV wall mount installation guide.
You may also use a level to ensure that your drill holes are level.
If no template is available just use the TV mount itself against the wall to mark the holes that need to be drilled.
Using Dyna bolts and concrete anchors
To secure the TV mount to a concrete wall, you can use any of several different types of bolts.
Your choices include true bolts, Dynabolts, and raw plugs with screws.
In most cases, it would be best to use the bolts that come with your wall mount.
However, keep in mind that raw plugs won’t be as strong as Dynabolts or true bolts, so you may have to change them out if you have a heavy TV.
And while true bolts are pretty easy to remove later on, you might have some difficulty removing Dynabolts. Understand concrete bolts and anchors in this guide.
In some cases, you may even have to use a Makita or Milwaukee angle grinder to remove stubborn Dynabolts.
5. Hocking the TV to the wall mount
Attaching the mounting bracket to the wall is only one part of the process. You will also have to attach the mounting plate to your TV so that it can be ‘hocked’ to the wall bracket. Here’s how to do it:
First, attach the mounting bracket to the wall.
Next, attach the mounting plate to your TV. With many TVs, you will first have to remove the stand to reveal the attachment holes. The holes may also be covered with plastic or may have screws in them.
Attach the mounting plate to your TV using the included hardware.
Lift up the TV slowly and hock it to the mounting bracket on the wall. If the TV is heavy, get someone to lend a hand so that you can both attach it properly.
How high to mount a TV on the wall?
How high to mount a TV to the wall, depends on a few factors. Consider the following:
The size of the TV.
The optimum viewing distance.
Eye-level height.
Viewing angle.
The optimum height for a 32” TV differs from that of a 42” or 55” TV. Keep in mind that you will have to measure the distance from the floor to the center of the TV.
You will also have to consider the ideal viewing distance using this formula: the size of the TV divided by 0.53 Therefore a 32” TV should be 60 inches away.
How to install a TV with no studs & with-out re-framing?
If the only available wall to mount your TV doesn’t have studs, and you don’t want to open a wall up don’t lose hope. You can still mount your TV to the wall with a few caveats. First, your TV must be fairly small and light and use a fixed mount instead of an extendable one.
If you can live with these restrictions, mount your TV pretty securely using the parts that come with the mounting kit. Here are some options to mount a TV to a wall without studs and opening up the wall:
First, check the mounting kit for plastic screws that are intended for use with plasterboard-only fixing.
These have a large thread but are only suitable for very small TVs and you definitely don’t want to rely on them for any type of extending TV arm.
They would also be less secure in the event of an earthquake or being knocked too hard.
Otherwise, think about adding an additional sheet of lining over the top of the current wall using a stronger lining like plywood or Partial board.
You would need to bolt the wall mount to the new lining before attaching the new lining to the wall this is due to the thickness of the new lining.
You wouldn’t be able to use the coach screws that came in the box, but instead, buy some nuts/bolts and washers that can be used to instead securely fit to a 1-Inch thick sheet.
How to remove a TV from a wall mount?
If at some point in the future, you wish to remove your TV from the wall mount, you will simply have to reverse the process of attaching the TV to the mount and installing it on the wall. Here’s how to take a TV off a wall mount:
First, lift up the TV from the bracket or wall mount. Get some help if your TV is heavy,
Next, remove the bracket from the TV, and reattach the original stand.
If you are removing the wall mount permanently as well, remove the bracket from the wall.
Fill in the holes in the wall with filler and paint over the area.
How to corner wall mount your TV?
If you want to corner wall mount your TV, an extending wall mount can work, a fixed wall mount will not.
A corner tv wall mount for a flat-screen TV will hold a TV in a room corner so that the screen can be more easily viewed from any spot.
Having a TV on an extended mount will make it easier for you to access the ports and controls without having to squeeze into a tight corner as well.
That made it look easy!
Learning how to install a TV wall mount and hook a TV up might seem like a bigger job than it is. But it is quite manageable after reading this guide and the guideline that came with your specific mount. You’ll have no issues dealing with them once you renovate your basement bar or tidy up your interiors to brown.
Most wall mount kits come with detailed diagrams and instructions as well, which helps you figure out which parts go where.
One thing to keep in mind is that if you are planning on installing your wall mount on a concrete surface, it might be better to go for bigger true bolts instead of plastic raw plugs if that is what comes in the box. These provide an added measure of security, which will come in handy also for a heavier TV, or in the event of an earthquake.
These tips will also help if you decide to go for a ceiling mount tv instead.