
- A few briefs about hole saws
- What do you need to know about hole saw and drill connection?
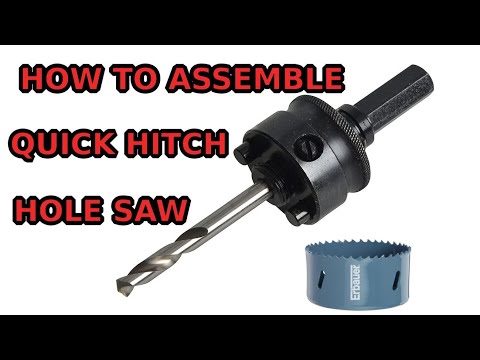
- Parts of a hole saw you should know
- 1. Choosing the pilot bit.
- 2. Assembling the hole saw size to the arbor.
- 3. Attach the hole saw arbor to the drill chuck.
- Test align the hole saw
- Tips for attaching the hole saw to a drill
- How to attach a hole saw bit to a drill press?
- Bonus tips for drilling holes.
- You can drill the perfect hole.
Last updated on July 7, 2025 3:36 am
A few briefs about hole saws

What should you prepare before assembling a hole saw to the drill?
You need to get the right pilot bit size, right hole saw size and right material before putting them together.
How to get the hole saw bit off?
If your hole saw has cutouts, you can simply insert a long screwdriver to pry it out. Or you can drive some screws on both sides of the wood until they reach the bottom and push each other, causing the wood to lift out of the hole saw. Or, simply remove the plug together with the hole saw while you disassemble them from the arbor.
Which hole saw material should I attach?
For multi-purpose use, use a bi-metal hole saw. For soft materials like wood, go for a carbon steel hole saw. For hard materials such as ceramic, fiberglass, or metal, use tungsten carbide hole saws. And for concrete and masonry, use diamond-edged teeth hole saws.
What if I want to drill a perfect square hole?
Use square-hole drilling mortising bits.
What do you need to know about hole saw and drill connection?
Aaron Barnett of BangingToolbox suggests: The relationship between a power drill and a hole saw is a companionship of necessity when projects require drilling out some large holes.
A hole saw is required to create and cut perfectly shaped, small to medium-sized holes quickly. A power drill provides the necessary torque to make this happen.
In short, a quality power drill is needed in order to attach a hole saw.
These two tools work together to create larger holes in a variety of materials, including wood, metal, plastic, and glass with the right type.

Parts of a hole saw you should know
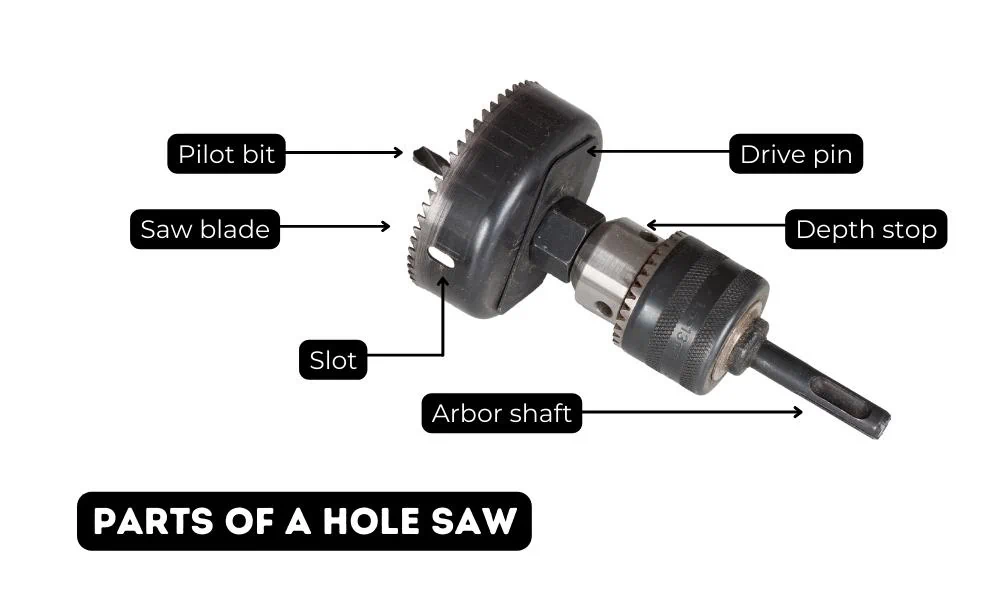
Before we proceed on how to change hole saw blades, you have to be familiar with the other parts of the arbor.
- Cutting blade. This part of the hole saw does the actual cutting. The blade is typically made from high-speed steel or carbide and is nice and sharp.
- Arbor. The arbor is the part of the hole saw that attaches to the drill [1]. This should be made from metal with a threaded portion that can be screwed onto the drill.
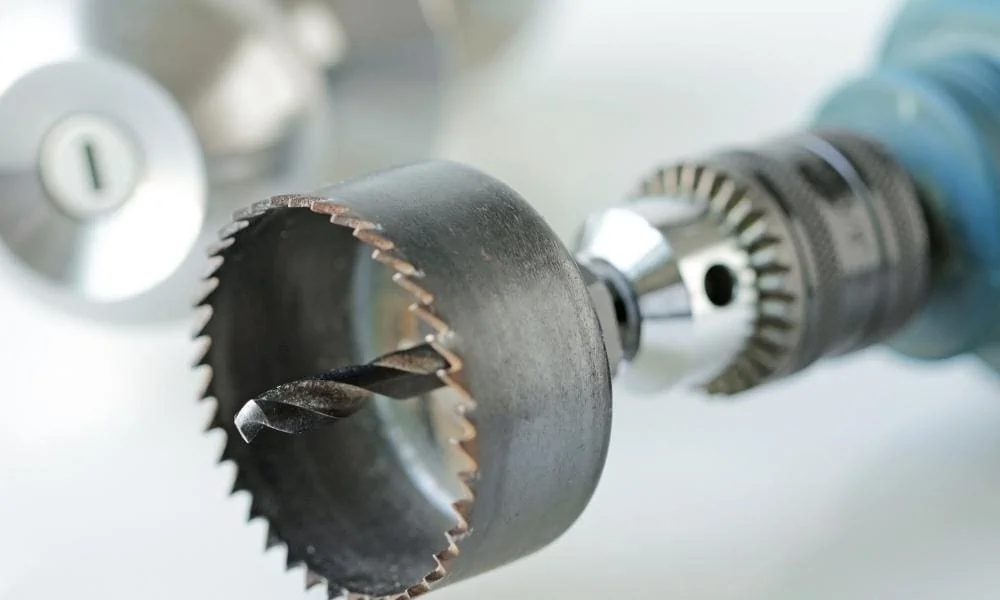
- The pilot bit. Is the small drill bit that pre drills into the material serving as a guide to help keep the hole saw centered when drilling.
- Depth stop. This allows you to control how deep the hole saw will cut. You will find the adjustable stop located on the arbor.
- Slots. These are located on the side of the hole saw and are used to eject the material being cut out.
1. Choosing the pilot bit.
The pilot bit is the part of the hole saw that drills the initial hole in the center to stabilize the saw. The size of the pilot bit will determine the size of the hole being drilled.
Make sure that the pilot drill bit is attached to the hole saw by using an LN key to fasten the bit in.
Drill bits come in various sizes, so be sure to select one that is appropriate for your hole saw and material. For example, diamond hole saws can drill through the glass.
Hard metal like stainless steel may better suit a smaller pilot hole. Nevertheless, you will always get the job done with a reliable hole saw set for the right type of job.

2. Assembling the hole saw size to the arbor.
You need to select the correct hole saw size from your kit for the sized hole you want before you change the hole saw bit.
Begin by screwing the hole saw blade to the arbor counterclockwise. Take note that a hole saw screws onto the arbor in counterclockwise movement, this helps stop it from undoing while cutting in a clockwise direction.
Once everything is lined up, tighten the screws on the side of the hole saw to lock everything in place.
When attaching the hole saw to the arbor of the hole saw, be sure not to over-tighten, as this can damage your drill or hole saw, but make sure to tighten as much as you can.

3. Attach the hole saw arbor to the drill chuck.
Now that you have attached the pilot drill bit and selected a hole saw the size and connected them both to the hole saw arbor making a single piece to connect the bit to a powerful cordless drill.
Insert the arbor of the hole saw into the drill chuck and then tighten it up by using either the toolless tightening method by hand on newer drills.
On older drills, you will need to use the chuck key until the drill insert is snug.
This, as will provide more torque than your hands alone for older drills.
New drills tighten by hand using an internal tightening system and only need to be done by hand.
Test align the hole saw
Before you begin drilling, a first class idea is to always test the alignment of the hole saw.
To do this, place the hole saw on a piece of scrap wood and test the drill to make sure the saw is rotating evenly and not wobbling.
If everything looks good, you’re ready to begin drilling some real holes.

Tips for attaching the hole saw to a drill
- Always use a tape measure or ruler to find and mark the center of the hole to drill. This will help ensure that the hole is drilled in the correct spot, by marking the center rather than the edges.
- When attaching the pilot drill, be sure to use a wrench or Ln key to tighten the connection to the arbor.
- Always test the alignment of the hole saw before drilling. This will help avoid any mistakes. Loose hole saw attachments pose safety and damage risks [2].
- When tightening the chuck, be sure not to over-tighten it. This can damage the hole saw or power drill.
- If the hole saw slips inside the drill, remove and re-install the entire bit straight away, this means that there could be an underlying issue with your drill’s chuck not being strong enough to hold under pressure. Continuing to let the bit slip will wear down and damage the arbor on the hole saw or the chuck of your drill.

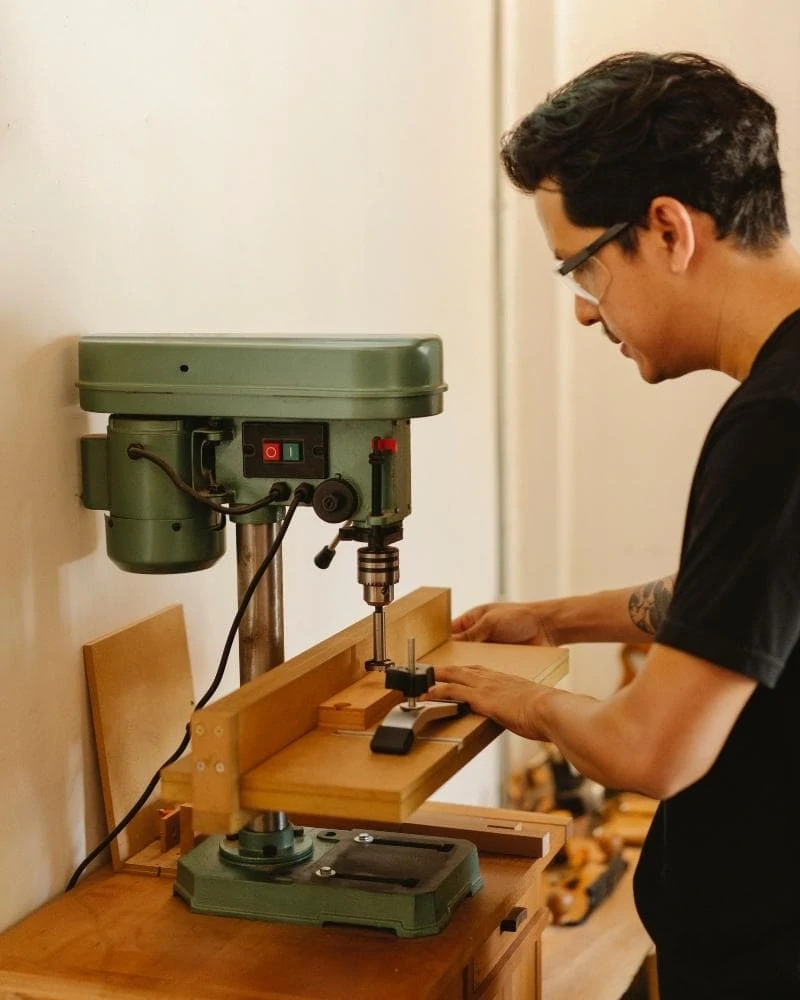
How to attach a hole saw bit to a drill press?
Using a drill press with a hole saw makes the job much easier. Here are a few steps to follow
- Attach the hole saw to the drill press chuck.
- Attach a scrap piece of wood to the table of your drill press to avoid hitting, damaging, and drilling the metal bench on your drill press after drilling through your material.
- Set the depth of the hole saw on the drill press to stop the drill bit from hitting the metal bench after penetrating the intended material. You need to let the bit partially go through the scrap piece of wood to fully cut your piece.
- Center the hole saw alignment over the workpiece in position for drilling.
- Clamp the workpiece to the drill press table.
- Turn on the drill press and slowly lower the hole saw into the workpiece.
- Let the hole saw do his job and then raise the drill press handle back up when finished.
- Turn off the drill press.
- Release the workpiece from the clamps.
- Remove the hole saw.
- Dispose of the cuttings from the blade.
Bonus tips for drilling holes.
If your hole saw gets blunt there are many ways to go about re-sharpening a hole saw find out here.
If you don’t have the right size hole saw, or you need a brand new kit we have great recommendations on all types of drill bits you need here.
If you need to drill square holes did you know it’s possible!
Find out more about the best square hole drill bits here.
You can drill the perfect hole.
The hole saw, and the power drill has a special bond. They love each other and do a first class job at drilling.
Any woodworker, carpenter, or handyman worth their salt knows this power tool combo is a match made in heaven.
With a little bit of practice, you’ll be able to drill perfect holes in any material you desire. So go ahead and give a new kit a try if you’re about to upgrade.
As a quality hole saw kit can get some decent-sized holes drilled pretty fast.
For bigger holes, you have to manually cut them out using a jigsaw tool, but is a little harder to get accurate, without sanding.
More information:
- Choosing the right bi-metal hole saw, an article from https://www.grainger.com/know-how/equipment-information/kh-choosing-the-right-bi-metal-hole-saw/
- How to attach a hole saw to a drill, a blog from https://www.doityourself.com/stry/how-to-attach-a-hole-saw-to-a-drill


