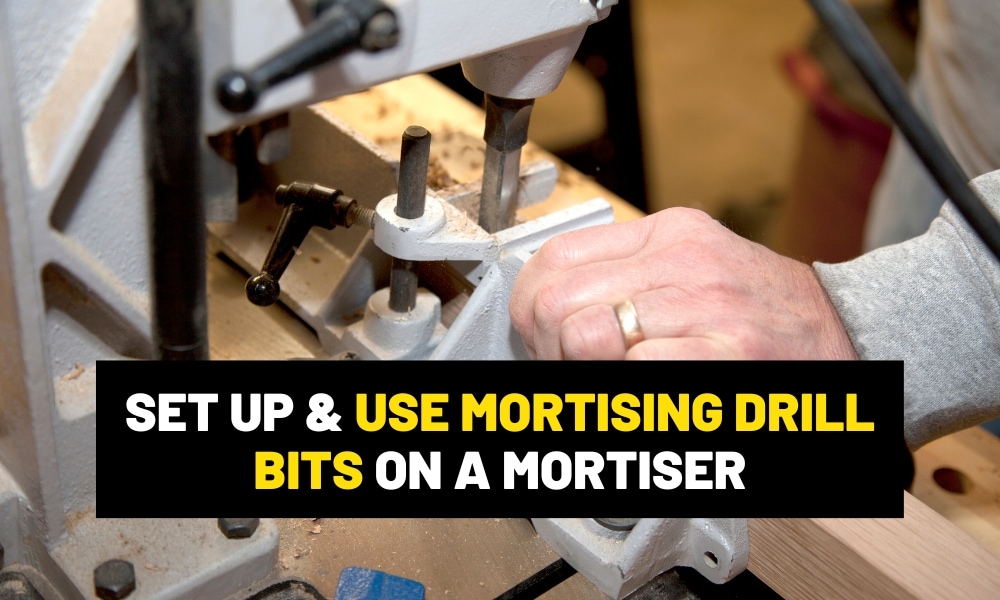
Last updated on March 23, 2026 9:41 am
Square holes on a drill press?
Aaron Barnett of BangingToolbox suggests: Cutting square holes or mortising can be a challenge, especially if you need to do it by hand.
Imagine the physical effort and the challenge of maintaining accuracy and precision. Good thing there’s a drill bit that can bore perfect square holes.
The square hole drill bits, also known as mortising bits, can drill holes and punch perfect squares into your wood piece.
A heaven-sent for many woodworkers, a square bit will be your mortising buddy when using your drill press for most woodworking projects you have on the horizon.
So if you are soon to work with mortises, this guide will help you use square hole drill bits specifically on a drill press.

What do you need?
Note that when you use a drill press, you will not only need square hole drill bits.
You will also need a chisel holder set or mortising attachment set, unlike when you cut mortises on a mortiser machine.
What you will need.
- Mortising attachment set for drill press
- Fence with hold down
- Mortising chisel set
- A piece of wood for the fence
- A piece of wood as a working table
- Dry lube
- Wood clamps
- Your wood piece

How to cut square holes on a drill press?
Step 1 Attach the hollow chisel mortising attachment.
Usually, a mortising attachment is sold separately from standard square-hole drill bits. But some kits already include the hollow chisel and auger bit.
To attach the bit to the drill press, unplug the machine first.
The hollow chisel mortising attachment will hold the hollow chisel when the machine is pressing.
To attach the holder, get the bushings or spacers, slide it up on the chuck, and snug it in on the stop collar. These split rings should be aligned with the opening.
When you fit the entire holder, you must also align the split opening of the holder to the split rings.
If you see the knob or screw of the holder, tighten it up so it doesn’t fall out when the machine is operating.

Step 2 Attach mortising chisel/ square hole drill bit set.
The square hole drill bit set is composed of a hollow chisel bit and an auger bit.
The auger bit slides inside the hollow chisel and drills a hole initially in the wood piece. The hollow chisel follows with a punch that creates the edged corners, which are now the mortises.
To attach them together, you should insert both parts together into the holder.
You need a bit of clearance on the tip of the auger so the assembly works together.
Insert them on the holder’s shoulder, and place a scrap of wood underneath to hold sturdy because the tips of these bits are extremely sharp.
As soon as the chisel touches the holder, tighten the knob to keep it snug, but make sure to put a 1/16-inch gap underneath.
Next, push the auger bit up on the chuck. When it feels snug, tighten the chuck.
After that, go back to the chisel holder, loosen the knob a bit, push the chisel back against the shoulder, and tighten it. That should give enough clearance between the hollow chisel and the auger bits.
Step 3 Apply dry lube between the chisel and the auger bit.
This process helps the hollow chisel and auger bit move against each other smoothly. Use a dry lubricant for this process and spray it on the tip of the bits.
After applying some lube, test your drill press by turning the machine on and hearing the sound.
The bits must not make strange noises other than the usual machine noise when the bit is at the center.
Step 4 Attach and secure the fence.
While you can set up the fence on the drill press table, setting it all up on a separate table gives more room for customization and alignment. Simply bolt down and tighten the fence on the table.
After bolting down the table, align the center of the fence to the drill bit.
Positioning is so crucial for achieving properly aligned mortises. You can check the position by lowering the bits and checking their alignment to the center of the fence.
Next, align the chisel bit tips with a wood piece. Mark your wood piece with a center alignment.
Draw onto the piece with your desired size of the mortise, which should fit with your tenon. At the end of the piece, mark your desired depth.
The center of the auger tip must be aligned with the center of the wood piece.
When the bits are aligned at the center, secure the other end of the table with a wood clamp. This should give your table room for adjustments when needed.
Once the wood piece is aligned with the square hole drill bits, secure the other end of the table also with your wood clamp.

Step 5 Set the depth.
You need to set the depth so the drill press will not cut down to the bottom of the wood into the metal support table.
Move the wood piece end beside the mortising bit alignment. Position the end where you can see the depth mark you made earlier.
Lower down the square hole drill bit and set the piece to the depth marked on the wood.
The depth should be aligned on the highest part of the arch of the hollow chisels. Set your drill press to this depth.
Step 6 Set the speed of the drill press.
The speed depends on your square hole drill bits size and your wood piece density.
In general, the speed ideal for mortising on wood is slow. Set your speed anywhere between 1000 and 1500 RPM.
Step 7 Secure the wood piece.
Now all has been set, position your wood piece where you will start mortising.
Mount the hold-down accessory at the center of the back of the fence. This accessory will secure your wood piece while the drill press is running.
Clamp it and check if the square hole drill bits can pass through the teeth of the stop collar of the hold-down.
Also, ensure that the hold-down is flushed on the wood piece.
Otherwise, you need to smoothen it with a planer or sandpaper underneath until it is flat enough when flushed on the piece.
Because if it is crooked, the wood piece might shake or become unstable while mortising.
The U-shaped rods that come with your kit should hold the wood piece by bolting them into the holes on both sides of the fence.
However, you need to remove them every time you adjust the wood piece.
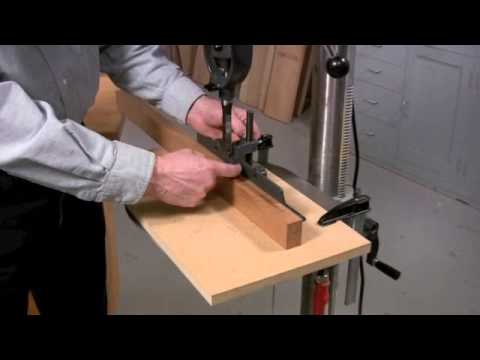
What you can do is use another wood board to secure the piece. Place it on the opposite side of the fence so the piece is in between the board and the fence.
Clamp the board on both ends. And you’ll be able to slide the wood piece left and right. Loosen the hold-down a bit to adjust while cutting.
Step 8 Start drill pressing.
At this point, when you have secured the wood piece, you can start adjusting the wood piece to your cutting mark and start mortising.
The secret to using square hole drill bits on a drill press
Using square hole drill bits on a drill press is a challenge.
The secret for using square hole drill bits on a drill press is proper setup and adequate support.
From setting up mortising bits to the working table and wood fence, you need to check the attachments and clamps twice. The wood piece has to be aligned well.
Use a slow and steady speed rate. And also, make sure the wood dust does not clog your drill bits and is extracted well.
Learn the art of control as you would when you manually square a hole with a chisel.
Use the right tool. Although there are other ways to cut square holes, there’s nothing like the precision of cutting with square hole drill bits.